How to Use Gotowebinar App for Windows?
Gotowebinar is a service that offers comprehensive webinar services. Among their latest delivery is a gotowebinar app for PC. The program features a very simple and friendly user interface. To access the service, you have to download and install the gotowebinar app for windows computer. Among the best attributes that present it as a very solid webinar service application is its multiple-language feature that allows you to select the language that you understand perfectly. As stated much earlier, the gotowebinar application provides webinar services. To help in your understanding of how to use gotowebinar, here is a step by step guide on how to create and of course, host a webinar using your gotowebinar windows application.

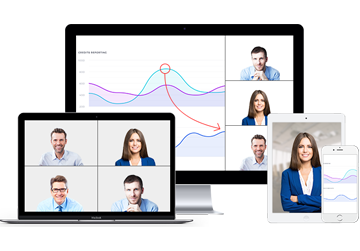
Best Webinar Tool for Windows
- Free for up to 100 Participants
- Fluent Group Video/Audio/IM Chat
- Screen Sharing and Whiteboard
- Webinar Cloud Recording
- Webinar Custom Branding
1) Make any necessary pre-arrangements
First and foremost, you download gotowebinar desktop app and have it installed. Also, ensure that you have either logged-in or registered for the service. This can be accomplished by following a few basic steps on the official website.
2) Pick a the webinar’s date and time
Webinars are basically virtual meetings that have been arranged, or rather scheduled much earlier. This means that even before deciding to host one you need to decide on the date and time. When scheduling the right time, you need to ensure that you have taken all your attendees, probably different time zones into consideration. The standard recommendation by the service provider is at 3:00 pm EST/ 12:00 pm PST on Thursdays.
3) Pick a topic for the webinar
This is pretty basic. Decide on the topic to be discussed in that session. If any, inform and have your guest speakers prepare. Ensure that the topic you pick motivates people to attend the event.
4) Make necessary customization on your branding (if any)
This simply means that you have to make any necessary changes on your profile, or any other thing that represents your brand. Choose whatever theme you have in mind for the webinar. Also, make additions such as adding a logo to your profile that will be viewed by your invitees.
5) Create your webinar’s hashtag
In order to have a very successful webinar, you need to advertise and promote the event. As times have told, the best and most effective way to share and push something on social media is using a hashtag. Having put that across, the smartest way of promoting your event is by creating and pushing a captivating hashtag.
6) Send your event invitations
This, as a matter of fact, is the backbone of your event. You need to ensure that you have maximized on the webinar’s publicizing. In short, use every means possible to ensure that your invitation has reached as many people as possible, or in this case; your intended audience. Having taken all the above steps very carefully, you are halfway through a successful webinar.
7) Create and build content for the event, or rather webinar
Remember that the whole reason behind everything you have done so far, and will do is that you pass the content created in this step to your audience. As a matter of fact, this is pretty much the most important step in the entire process. Take care with what will be presented on the webinar. Also, you might need to engage handouts, polls, and slides to really make the best out of it.
8) Do a pre-trial, or rather perform the webinar
Basically, this part gets you and your guest ready for the presentation. It has all of you as comfortable as possible with the presentation. Test all your gotowebinar windows application controls and ensure that all of them are in perfect working conditions beforehand.
9) Host the webinar
This is quite easy as long as you follow the right steps. Just navigate to start the meeting and have your webinar on air. As the application’s user interface is very easy, don’t forget to record the webinar for further assessment and sharing of the webinar.
And you are done! That is all it takes to host a successful webinar on your gotowebinar windows application. This one definitely sounds as easy and fun as it actually is.
Advantages associated with the use of gotowebinar for PC
a. With the desktop version, you can have your account details saved so you don’t have to keep repeating the same old login and verification process.
b. The desktop version lets you engage your targeted audience in HD audio and video.
c. With the gotowebinar desktop app, you can have contact with much more credible and potential clients, an application away.
These are among the top advantages of downloading and using gotowebinar application for windows. Another alternative for gotowebinar for windows that’s quite as effective and efficient is ezTalks Webinar.
Conclusion
With the internet in place, virtually everything is going online. From classes, calls, and meetings among other events. Gotowebinar ensures that all your online events are well-catered for. Ensure you have your gotowebinar desktop application download installed to enjoy the full experience. You can also download and install the gotowebinar app for mac. It works in the same manner and offers the same magnificent features exhibited in the gotowebinar windows application. Without further say, gotowebinar is without doubt an incredible marketing assistant.